Showing posts with label Design. Show all posts

Saturday, November 13, 2010

It's Time to Start Saving the World. One Bag at a Time.

Every year, billions of plastic bags end up in landfills, where hey can remain for thousands of years, slowly breaking down into toxic pieces. Plastic bags are cheap and easy, but let's think about where they end up once we unpack our groceries. As stated in a National Geographic News article, "They sit balled up and stuffed into the one that hangs from the pantry door. They clutter landfills. They flap from trees. They float in the breeze. They clog roadside drains. They drift on the high seas. They fill sea turtle bellies". So then what about paper bags? Well, according to the same National Geographic News article, "Compared to paper grocery bags, plastic grocery bags consume 40% less energy, generate 80% less solid waste, produce 70% fewer atmospheric emissions, and release up to 94% fewer waterborne wastes". It almost seems as though plastic bags are the environmentally friendly choice. But we all know this is not the case. So what needs to be our response when the cashier asks "Paper or Plastic"? The answer should be neither!

Reusable bags are so easy to come by now. Almost all grocery stores sell them now, and they are fairly cheap as well. My husband and I started a traditions of purchasing a new reusable bag for every trip we took. Instead of traditional souvenirs, we opt for reusable bags. And there are now so many varieties of reusable bags, that they are actually becoming more convenient that the overused plastic bags. They may not be "free", but they certainly don't cost the world as much as paper and plastic do!

There are a lot of online retailers selling really great reusable products. Envirosax is a great place to shop when looking for reusable bags. They offer quite a few varieties and options. 
Enirosax Pouch- $39.95
The Envirosax Pouches come in a variety of designs and colors. 

Evirosax Organic Series- Hemp- $24.95
The Envirosax Organic Series offers many different designs and many different materials. The pictured bag above is made from hemp. But other choices include organic cotton, bamboo and linen. 

Envirosax Children- $8.95
Envirosax even offers reusable bags for children. 

Another great place to look is Reisenthel. They have a HUGE variety of reusable shopping bags... and they aren't your typical shopping bags. The product cannot be purchased directly from the Reisenthel page, but you can take a look at all of the options. The bags are sold throughout the US, and there is a dealer locator available on the Reisenthel website. You can also purchase the bags through various online dealers. 

Reisenthel Shopping Basket

Reisenthel Easy Bags

Reisenthel 9 Bottle Tote

Reisenthel Reusable Bags

There are many other companies that design reusable bags as well. So let's start saving the world... one bag at a time! Happy shopping!


Friday, November 12, 2010

Peacock Inspired Design

Now that we have completed the yellow and gray guest bedroom... it's on to my design inspiration for our living room! Prior to moving into our new house, I had our apartment living room decorated in browns and greens. I still absolutely love the color combination... but I decided I wanted to go a bit more bold this time around. I still wanted to keep the greens and browns... I just wanted to go a bit brighter with the greens. Soon I started thinking about incorporating some blues and purples (the peacock colors) because I was having such a difficult time finding the specific shades of greens I had in mind. I see the greens all over while I'm watching HGTV... but again... I live in Oklahoma. I do not have access to a HomeGoods, Ikea, Z Gallerie, CB2, CostPlus or West Elm. I'm pretty much limited to Target, Ross, Pier 1, TJ Maxx, and Gordmans. Don't get me wrong... I love shopping at these stores as well... I just wish I had more access to better variety.

Anyway... I found a peacock blue throw from Pier 1 that I completely fell in love with. So, we ended up decided to decorate in mostly bright greens and peacock blues, with a possible touch of purple here and there (if I were to find the right pieces). The living room is still a work in progress... although we finally decided on our color scheme. So I started collecting bits and pieces for the room based on my idea of peacock inspired design. Below are a few images of what I have been able to put together so far...


The above pillow was purchased from Pier 1. They also carry the same pillow in a peacock blue color, but I chose to go with the green instead. 


This peacock blue throw was purchased at Pier 1 as well... and I absolutely LOVE it!


Above is a snapshot of the pillows and throw together on my couch. All purchased from Pier 1. I took this picture on my phone... so the colors don't appear quite as vibrant as they really are. 

The rest of the items pictured below can all be found at Z Gallerie. 


I will add updates as I continue to uncover more items to complete my peacock inspired living room. So far, it is coming together beautifully! In this post, I decided to share the greens, purples, and blues that we will be bringing into the room as the pops of color. But, we have also decided to add in several all white pieces to the design as well, since we decided to go with dark wood furniture and floors. We wanted to lighten the room up a bit with the white, but we also chose to bring in some of the peacock shimmer and shine with our floor coverings. The pieces of white and shimmer will be posted at a later time! So stay tuned!!!


Thursday, November 11, 2010

Yellow and Gray Bedroom- Update

The Yellow and Gray guest bedroom is almost complete! We are still working on one art piece for the wall across from the bed... but apart from that... the room is done! The majority of the items used in this room were purchased from Target, but there are a few select pieces from Pier 1. The bed was designed and built by my fabulous husband, and turned out to be amazing! I do love being married to a talented guy... it definitely helps! It was difficult to get a picture that covered the whole room... but I did my best! ENJOY! P.S. If you are wondering about a specific piece, refer to my previous blog entry titled "Yellow and Gray Bedroom". Links are provided.


Saturday, October 16, 2010

Yellow and Gray Bedroom

I love the combination of yellow and gray in home decor... and I found the most amazing yellow and gray pillow at Target by DwellStudio. (Peony Decorative Pillow)


The pillow became my inspiration for an entire room. I decided to start collecting yellow and gray items, as well as a few black and white pieces, and began decorating our guest bedroom in the yellow and gray color scheme. I LOVE IT! The room is not complete yet... but will be soon. My husband even designed and built the platform bed for the room. We just need to stain it and make the headboard... and the room will be complete!

Below are a few more pieces I picked up for the room (all very affordable, and all from Target)....


Pictured Above: White Tear Drop Lamp


Stick around to see how I put all the pieces together.... even the tablecloth (in a bedroom)!


Friday, October 8, 2010

A Little Color Splash...

I am a complete HGTV junkie... although I am getting extremely sick of watching reruns of House Hunters, and House Hunters International. And this season of Design Star was pretty much HORRIBLE... with the one exception of the WINNER (Emily Henderson). I picked Emily as the winner from episode one (even though she totally blew that challenge and could have easily been eliminated after the first challenge of the season!) But one show that (almost) never lets me down, is David Bromstad's Color Splash (and Color Splash Miami). Like any successful designer, David works to please his clients, and design taste will never be the same from one client to another... so it happens quite often that David produces a room that doesn't come anywhere close to my design style. BUT, no matter what the style of the client, David's rooms almost always carry elements of design that I would LOVE to bring into my own home. And, of course, that is why I have to consider him one of my favorite designers of all time! Below are a few pictures of David's designs with the FANTASTIC design elements that I love!


The design above in no way reflects my personal design style, but I really love the graphic patterned pillows used on the couches, the hardwood floors, and the table lamps. I also think this is a really great color scheme (although I would prefer it in a bedroom).


Again, the design above does not really fit my personal taste, but I love the clean, modern lines of the furniture pieces in this design. I also love the enormous print on the wall behind the couch. My favorite design element in this room, however, is the color scheme. I love designs that start of with the neutral elements in the room, making those typical "non-colors" (such as blacks and whites) part of the design. But in order for this to look good, dramatic pops of color must be brought in. In this design, the blues stand out so perfectly from the backdrop of neutrals, that I can not help but call this great design.


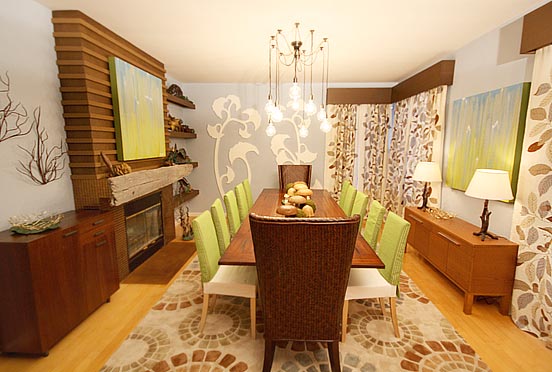
The two pictures above are just different angles of one completed room. I LOVE this design. While it is certainly not for everyone, and is slightly more bold that I would probably go in my own home (or at least more bold than my husband would allow me to go), I LOVE it! Where do I even begin with this room? Let's start with the color green... my personal favorite, and it works so well in this space. It is difficult to see from these pictures, but the green wall is actually made of large sheets of glass that have been backpainted with the lime green color, and then attached to the wall. I have been wanting to do this as the backsplash in my kitchen for a VERY long time (with the exact same color shown above), but I have had no luck finding anyone in Oklahoma to do this. You can order the paint online, and purchase the glass separately, but with such a costly project, I'm afraid things won't go quite as planned!

Moving on, as in the previous room, David has chosen a neutral backdrop of colors and clean lined furniture, and added those pops of color (in this case we see the greens, the purples, the pinks and the yellows). I love the use of the poufs for extra seating (I have two in my own living room, and finding cheap poufs can be an extreme challenge... I finally found mine at Target). And finally... I absolutely love the rug! I used to be a fan of the plain and simple rugs, but I have recently discovered a love of giant, bold patterns, like this one. The one thing I don't like is when patterns become too busy, and this rug is perfect with two giant flowers. I have come to truly admire the designs of Amy Butler and Thomas Paul (both will later have a blog dedicated to their designs as well).


I wanted to include the two pictures above because I love the large, graphic patterns that David used on the walls. My one issue with wallpaper is that the big, beautiful patterns tend to repeat so often that it becomes a busy mess that gives me a headache. Otherwise, I would love to put some big, BOLD patterns on my wall. Unfortunately, I am not the skilled artist that David is.


Can you guess why I love the above room??? Green, green, green! It's beautiful! And this time, David chose to add the pops of color in reverse, making green the main color in the room, and adding pieces of brown and white to compliment the decor. I love it! If only my husband would agree to let me go so bold!


So, once again, I included the photo above because I love David's choice of color for the room. I love the combination of yellow and gray. In fact, I just decorated my guest bedroom in this color combination. It took some effort to convince my husband, but it looks great, and he loves it! We chose to go with yellow, gray, black and white. Although trying to find really great yellow and gray, or yellow and black bedding is almost impossible! Everything I have been able to find runs upwards of $250! So we still have a few finishing touches before the room is complete... but I will be sure to post pictures once it's done!

So that's it for my tribute to David Bromstad and his amazing splashes of color! I hope it helps you with your design inspiration!

Friday, September 3, 2010

Our Oklahoma Version of the Modern Craftsman

My husband and I recently built a new house with Ideal Homes here in Oklahoma. While not an entirely custom builder (we picked out our floor plan and elevation from those available), we were able to upgrade and make changes to the house during the selections process. We really loved the floorplan of the house we chose, but weren't big fans of the curb appeal offered by the floor plan. Ideally, we would love to purchase a beautiful old Craftsman that we can renovate and make our own, but we don't plan on staying in Oklahoma more than 5 years, so we didn't want to take on any huge (and costly) renovations. Especially since this is our first house. Plus, we wanted a house that would sell easily, and since we don't really have an "Oklahoma Design Style", we didn't want to personalize the house too much. We decided that we would wait for that. We decided to make some design changes to both the interior and exterior of the house in order to get closer to that Craftsman feel (on the outside), and modern, eco-friendly design (on the inside). We requested several changes that were made during the building process, and we also made our own changes once we moved in. We decided to make several changes on our own because, as I said earlier, Ideal Homes is not a true custom builder. There were several things we wanted to incorporate into our home that Ideal Homes did not offer. We even asked if we could purchase the items we wanted, and have the builder install them as they went, but that was not an option. As of right now, we have not completed all of our changes, but we are getting there.

In this post I will cover the changes that we have already made to the exterior of the house.

The first change we requested was to the columns of the front porch. We really did not like the design of the columns, so we chose to incorporate tapered columns instead, which came out beautifully. Below is a picture of how the columns would have looked (left) and what our columns look like (right):
The pictures are somewhat blurry, but you get the idea.

The original plan called for siding on the side gables of the house, which we did not like either. Instead, we requested the Tutor style batons. Below is a picture of this change as well (even though it is difficult to see the siding from this picture). The picture on the left is of the side gables from the original plan, and the picture on the right is of our house:
We didn't like the fact that we were only able to choose one paint color for the exterior of the house either. We chose to go with two paint colors (a green and a tan), which are classic Craftsman style colors. You can also see the paint colors that we chose in the picture above.

We also changed out the carriage lights on the garage. The selection center with Ideal Homes did not have any that we liked, so we purchased them from Lowes, and installed them ourselves. They look so much better than the lights that came with the house. The picture below on the left is of the original carriage lights, and the picture in the right is of the lights we installed:
Our new lights are also eco-friendly in that they only turn on when it is dark outside. So if we accidently leave the lights on during the day, we aren't burning a ton of electricity. They remain off until the sun goes down! And they look great, too!

We did some landscaping in the front as well... although we are waiting until next Spring to do the majority of the work, as many plants are already past their blooming season. We want to plant quite a few trees, both in the front and the back yards. We chose black mulch for our yard, which looks amazing. It gives the yard a more modern, clean look.

The next two pictures are just for comparison purposes. The house of the left is the same floor plan and elevation as ours, but it was a field home, and changes were not made to the existing plan (so it is what our house would have looked like had we not requested to change things up a bit). The house on the right is ours (prior to the new carriage lights).

We are very pleased with how the changes turned out. I can't wait to continue making this house truly our home! We have already made quite a few changes to the inside of the house as well, but I will wait to cover those in my next post. Most of the changes to the inside incorporated eco-friendly, modern design elements into our Oklahoma home (which is no easy task).

So until next time... keep living small and enjoying it. I am!